Generic Webhook Input
The Generic Webhook input is the most flexible input type in Relaye, accepting JSON payloads from any HTTP source. This makes it ideal for custom applications, CI/CD pipelines, monitoring systems, or any service that can send HTTP requests.
How It Works
When you create a Generic Webhook input, Relaye generates a unique URL that external services can send HTTP POST requests to. When a request is received:
- Relaye validates that the request is intended for your team
- The payload is parsed and stored as an incoming log
- Any enabled connections linked to this input are triggered
- Each connection applies its template to the payload
- The formatted notification is sent to the configured output
Creating a Generic Webhook Input
To create a Generic Webhook input:
- Go to the Inputs section
- Click New Input
- Select Generic Webhook as the input type
- Give your input a descriptive name
- (Optional) Add a description
- Save to generate your unique webhook URL
After saving, you'll see your unique webhook URL. This is the URL you'll provide to external services that will send notifications to Relaye.
Using Your Webhook
Webhook URL
Your webhook URL will look something like this:
This URL is unique to this input and should be kept confidential. Anyone with this URL can send notifications to your Relaye instance.
Request Format
The Generic Webhook input expects:
- HTTP POST requests
- Content-Type:
application/json - Body: A JSON object
Basic Example
Here's a simple example of sending a notification to a Generic Webhook input using curl:
curl -X POST https://your-relaye-instance/YOUR_TEAM_ID/YOUR_INPUT_TOKEN \
-H "Content-Type: application/json" \
-d '{"message": "Server CPU usage exceeds 90%", "severity": "high", "timestamp": "2023-04-21T14:25:30Z"}'
Including Files
You can also include files with your webhook by using multipart form data:
curl -X POST https://your-relaye-instance/YOUR_TEAM_ID/YOUR_INPUT_TOKEN \
-F "message=Server CPU usage report" \
-F "relaye_files[]=@/path/to/cpu_report.pdf"
The relaye_files[] parameter allows you to upload files that can be included in your notifications. This is particularly useful for sending reports, logs, or screenshots along with your notifications.
Accessing Payload Data in Templates
When creating a connection for your Generic Webhook input, you can access any field from the payload in your template.
For example, if your webhook payload is:
{
  "message": "Server CPU usage exceeds 90%",
  "severity": "high",
  "timestamp": "2023-04-21T14:25:30Z",
  "server": {
    "name": "production-web-01",
    "ip": "10.0.0.1"
  }
}
You can reference these fields in your template using Liquid syntax:
🚨 Alert: {{ message }}
Severity: {{ severity }}
Time: {{ timestamp }}
Server: {{ server.name }} ({{ server.ip }})
For more information on templating, see the Templating Guide.
Security Considerations
Generic Webhook inputs don't include built-in authentication. Anyone with your webhook URL can send notifications to your Relaye instance. To secure your webhooks:
- Keep your webhook URLs confidential
- Use specific inputs for different services to limit the impact of a compromised URL
- Regularly check the incoming logs for unexpected notifications
- Consider implementing IP filtering on your instance if possible
Common Uses
Generic Webhooks are incredibly versatile. Here are some common use cases:
- CI/CD Pipeline Notifications: Get notified when builds succeed or fail
- Server Monitoring Alerts: Receive alerts when servers experience issues
- Custom Application Events: Send notifications from your own applications
- IoT Device Updates: Get notified when IoT devices report data
- Security Alerts: Receive notifications about security events
Troubleshooting
Common Issues
Webhook Not Received
If your webhook isn't being received:
- Verify the URL is correct
- Check that the request is a POST
- Ensure the Content-Type is set to
application/json - Verify the payload is valid JSON
- Check the incoming logs in Relaye to see if the request was received but failed processing
Template Not Rendering Properly
If your template isn't rendering as expected:
- Check that the field names in your template match the payload exactly
- Verify the payload contains the expected data
- Use the template preview feature to test your template against sample data
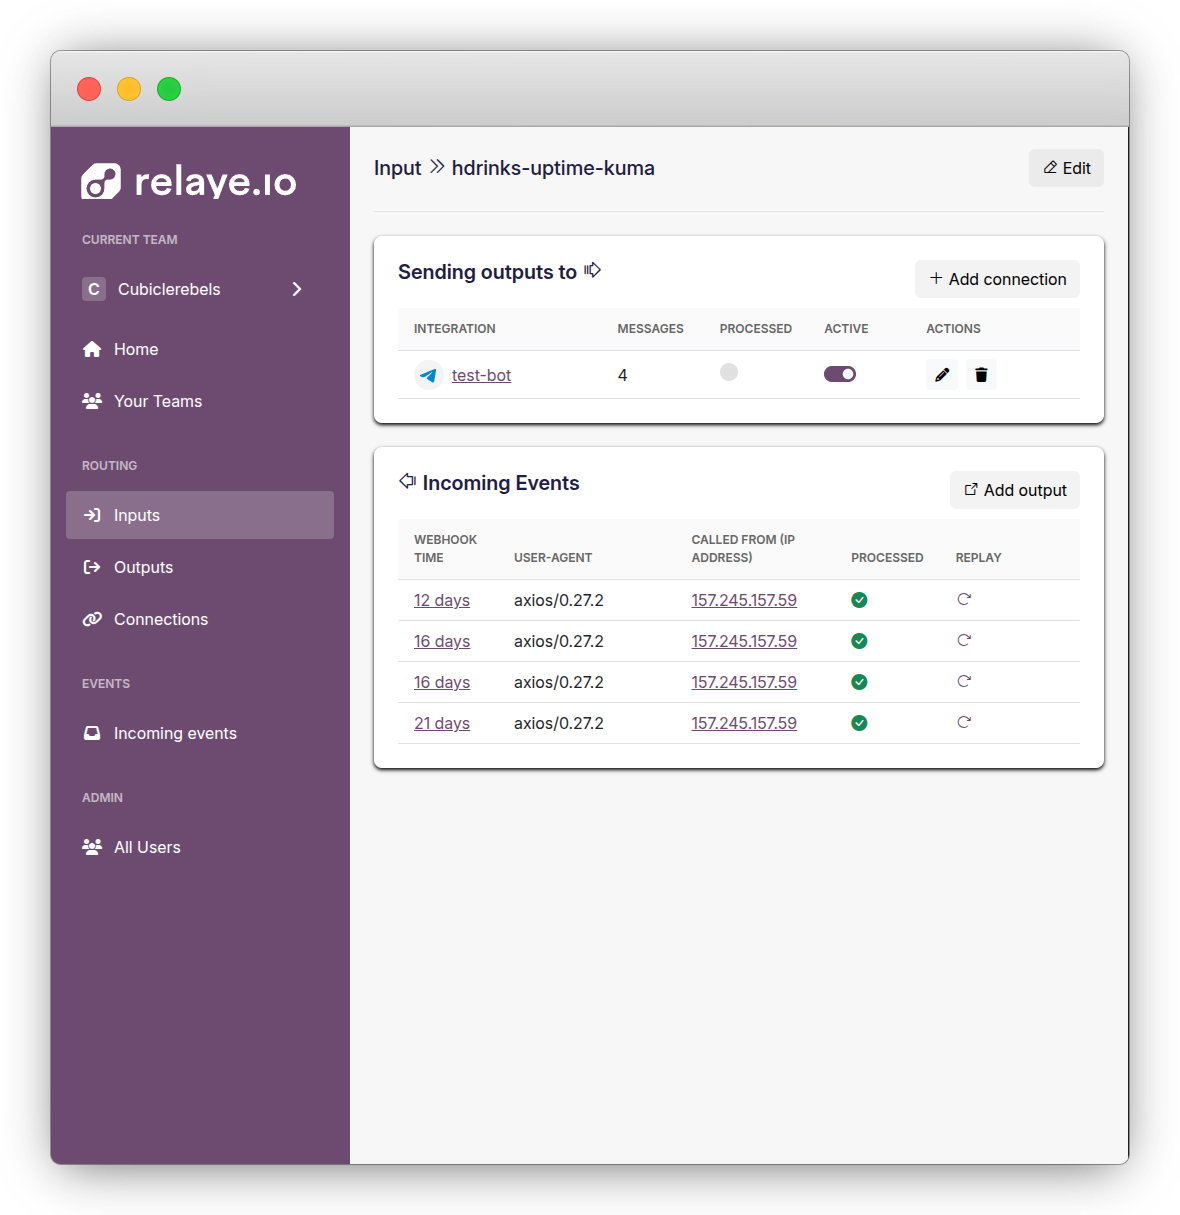
Viewing Webhook Logs
You can view all incoming webhook requests by:
- Going to the Inputs section
- Clicking on your webhook input
- Navigating to the Incoming Events tab
This will show you all received webhooks, their payloads, and their processing status.
Best Practices
- Use descriptive names for your webhook inputs
- Create separate webhook inputs for different services or notification types
- Include relevant context in your webhook payloads (timestamps, severity, source)
- Use templates to format notifications consistently
- Regularly check the incoming logs for failed webhook deliveries